I thought it would be really neat to be able to post step by step instructions of everything I am doing on the bathroom, make it a resource for others. But, as I have continued on in this process I have realized I have no idea what I am doing, and therefore, cannot give advice to others. Instead I’ll just tell you my experiences, and we’ll see how this room pans out. But please read, commiserate, give your own 2 cents, and if you happen to be in the middle of a diy bathroom renovation yourself,and I can some how help please, please, please ask any questions. I would love to help.
On my last update, I had just poured the leveler and was feeling a bit uneasy about it. I now know to trust my instincts because it was clear when I stuff dried, that the problem (our plywood subfloor is warped) was not fixed. Devin and I talked about maybe trying to even out the flooring with thinset mortar (which is the next step) but I was uneasy about it because I have never worked with mortar before. So I decided to try self leveler, which I hand originally intended to purchase, but the guys at Lowes talked me out of it.
I am happy to report that Lowes gave me a refund for the leveler. And I purchased the self leveling powder. When I got home I used the handy mixer shown above to mix the self leveler with 6 quarts of water all up. The mixer attaches to a power drill, and trust me, it works waaayyyy better that the paint stirrer I’d used the previous day. This texture of the self leveler was much thinner that the leveler. I basically poured it over the floor and it went where it needed to go. At times I gave the stuff a little encouragement (like in the corners), but it really did all the work on it’s own. And 6 hours later, I had a beautifully level floor (well it wasn’t perfectlly level, but close enough). My advice is don’t be shy, lay that stuff on thick!
We bought this book:
Here’s How: Ceramic Tile, from Black and Decker for under 10 $ and it’s helped a lot. It gives clear step by step photo and text instructions. It talks about everything ceramic tile. I highly recommend it if you’ve never installed tile before, and maybe still if you have.
The next step was laying backer board. Backer board is basically the concrete version of plywood. It was what protects the subfloor from getting (more) water damage. We cut the backer board to fit via two methods. The first was by scoring it, then hammering one side. When we couldn’t do that, we used a jig saw with a carbide blade. We laid it down, made sure it fit, and noted where each piece ended, and picked it back up.
Then we mixed the thin set mortar using the instructions on the back (using that handy mix tool again) . I used an 1/8″ notched trowel to spread the mortar. I would spread only enough to go under 1 piece of backer board, then lay the backer board, then move on to another section.
Once the floor was completely “backer boarded,’ Devin drove screws in every 6″ around the perimeter and every 8” in the center. During this step, there was a lot of muttering and cursing under his breath. I think he broke 4 bits. Finally I filled the gaps between the backer board in with mortar and mesh tape. Now to be patient. It must cure for 48 hours before I can lay the tile.
Are you still with me? Cause I know this post is running a little long, if you are, then great, now for the (slightly more) exciting part. The tile reveal. If you read my post where I describe vision for this bathroom, then you know I had to planned to go with something like this on the floor.

We put it in our downstairs half-bath (well, we paid somebody to do it.) and love how it came out And at less than 3 dollars a square foot, it fit in our tiny budget. But… after talking to a few people who said, A.) it is very thin so it is more likely to crack, and B.) it can be a challenge to install, I began rethinking this. Given our not perfectly level floor and my inexperience, this tile was a bad idea.
And then I fell in love!
With this tile:
Let’s get closer:
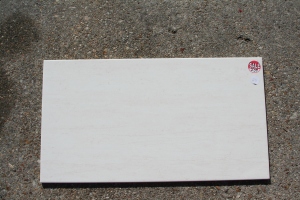
I Love it. It’s white, and shiny, and it has just a little subtle movement. And it’s a rectangle. It’s gorgeous, I think it needs a name, any suggestions? How do we feel about Betty?
It was made by a company just down the street (in New Orleans) who recently went out of business. Wholesale Flooring, the tile store I found it at, bought all the remaining tile. It is 13×24 and at $2.39 a tile, it is an amazing deal.
So this is where I am at. It’s progress right?


